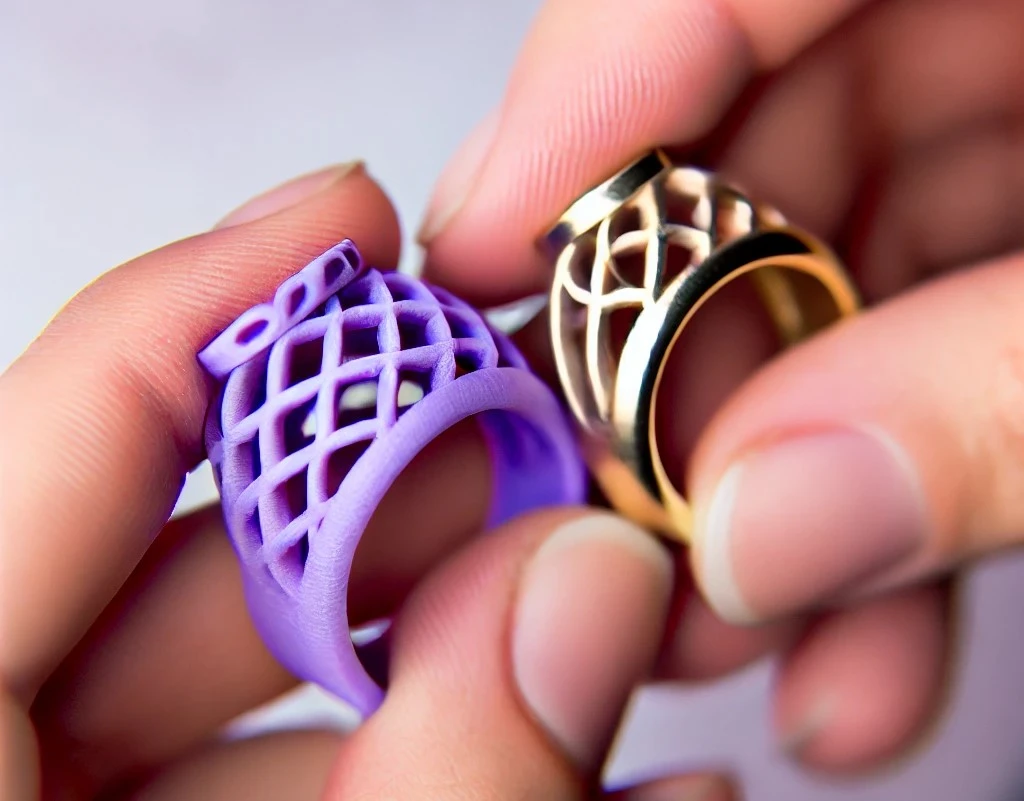

Most jewelry 3D printing support settings failures come down to three parameters: contact diameter, overhang angle threshold, and model orientation. Get those right for a single piece and the rest follows. For prongs and claw tips, keep contact diameter between 0.15–0.25 mm — anything larger leaves a scar you can’t polish out. Tilt the model 30–45° before touching anything else; that one move eliminates 40–60% of supports before you’ve changed a single parameter. And if you’re printing with wax-based resin, forget the defaults entirely — BlueCast X-Wax and Envision One behave nothing like standard castable photopolymers and need a different approach at every step. Where it gets harder is tall, packed casting trees — more pieces, more geometry conflicts, more support paths competing for the same space. That’s the problem JewelsPrint (our 3d printed jewelry casting tree support solution) is built for.
🎙️ Prefer audio? Listen to the podcast summary here.
1. The Jewelry 3D Printing Support Settings That Actually Matter
Jewelry is not a bracket. It is not a phone case or a dental model. The geometry is organic and asymmetrical, the features are tiny, and the material cost of scrapping a failed casting tree can run into hundreds of dollars. That context matters when you dial in your jewelry 3D printing support settings — every parameter has a cost if you get it wrong.
Contact Diameter: The Single Most Important Number
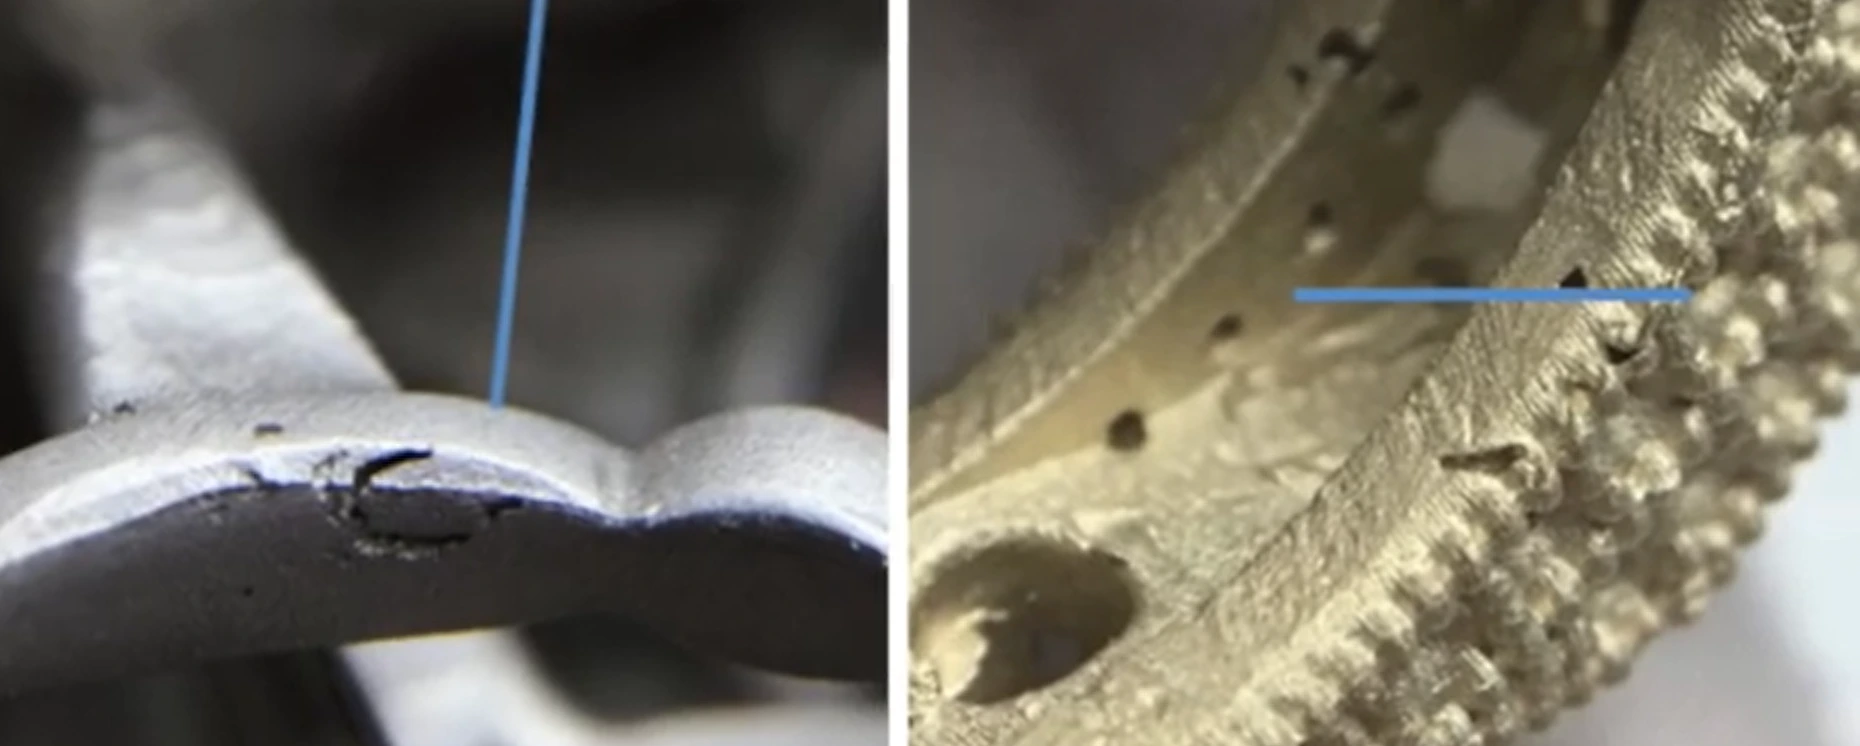
The contact diameter is where the support tip physically touches your model. Too large and you leave a visible scar on a prong face you cannot polish back. Too small and the support detaches mid-print — often at the worst possible point in a 12-hour overnight run.
| Feature | Recommended Contact Size | Why It Matters |
| Fine filigree | 0.15 – 0.20 mm | Invisible on removal; prevents fusing into open lace work |
| Prongs and claw tips | 0.20 – 0.25 mm | Critical visibility zone — any scar is hard to polish out |
| Ring shank | 0.25 – 0.35 mm | Structural hold with manageable post-print cleanup |
| Thick bezels | 0.35 – 0.50 mm | Heavier geometry needs more contact surface area |
| Base / structural elements | 0.40 – 0.60 mm | Maximum adhesion where surface aesthetics are less critical |
| 💡 Pro Tip
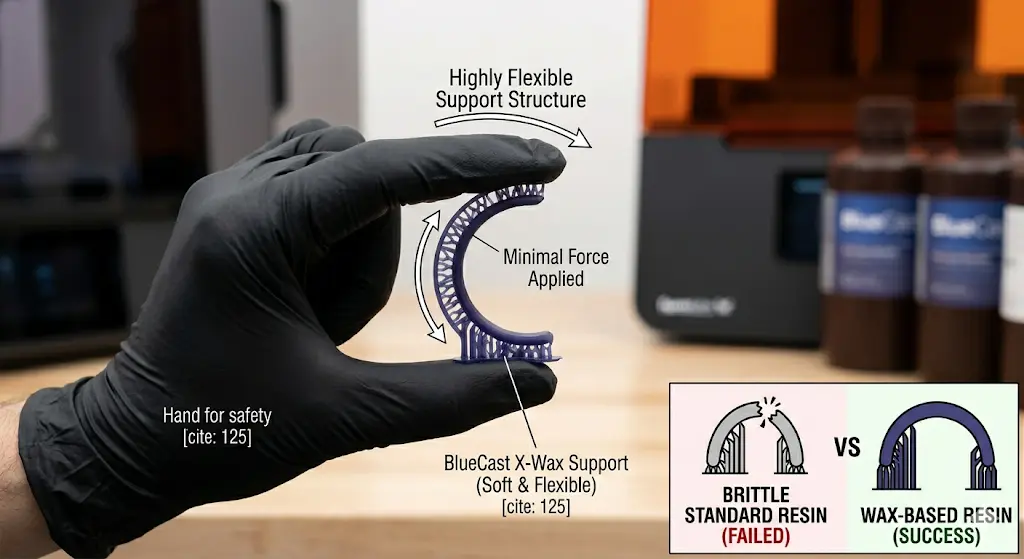
For wax-based resins like BlueCast X-Wax or Envision One: these materials are soft and flexible after printing — not brittle. You can often remove supports with gentle pressure rather than clippers. Some jewelers use a brief warm-up (or UV post-cure) to slightly harden wax resins before removal, making delicate features easier to clean without damage. |
Overhang Angle: Where Support Becomes Mandatory
In SLA and DLP resin printing, peel forces act on every layer as it separates from the vat. This is fundamentally different from FDM — a 30° overhang that would print fine in PLA may absolutely need support on a resin machine. The practical threshold for jewelry is:
- 0–20°: Generally self-supporting with correct orientation
- 20–45°: Evaluate case by case — depends on feature length and cross-section
- 45°+: Almost always requires support in resin printing
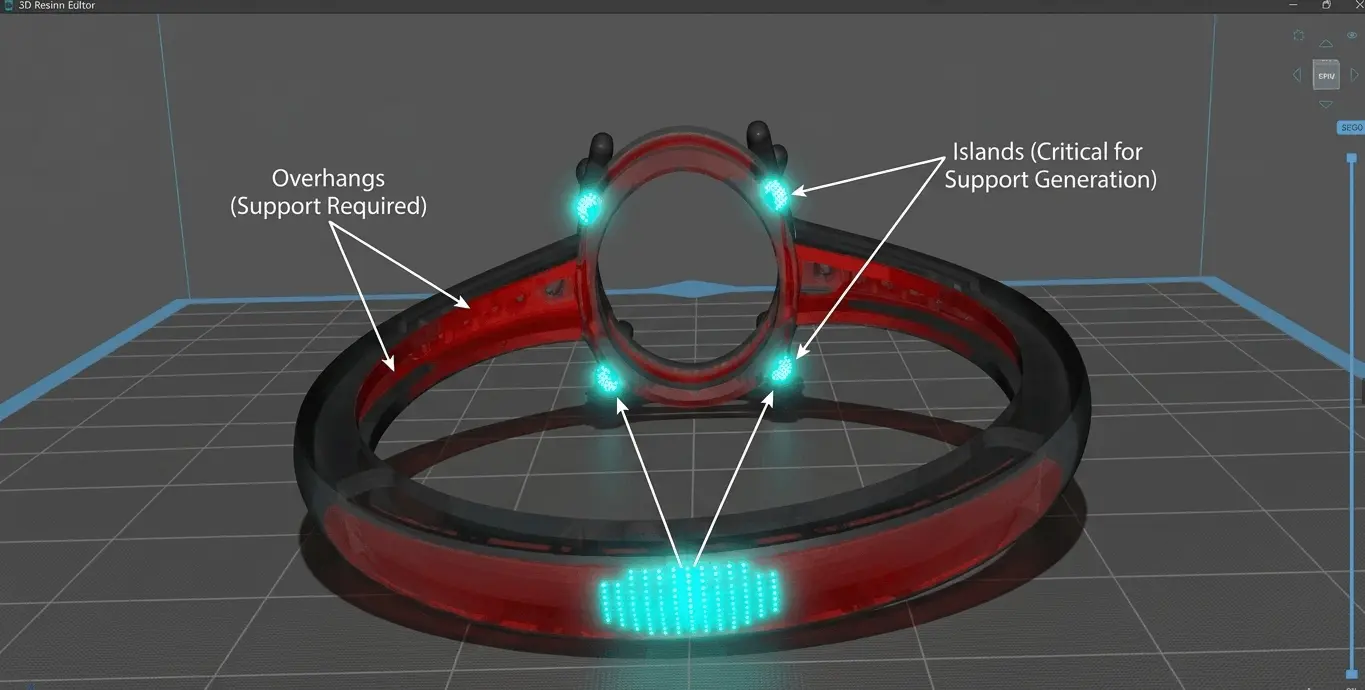
- Islands (floating geometry): Always support, no exceptions
Prong tips, gallery undercuts, and bail openings are the most common island traps in jewelry models. They look connected in the render — but at the first few layers they are floating geometry that will drift or curl without support.
| 📐 Islands vs. Overhangs: Not the Same Problem
An overhang is geometry that is still connected to the rest of the model — it is leaning out at an angle, but it has a continuous path back to the build plate. With the right orientation and a low enough angle, overhangs can sometimes self-support. Islands cannot. An island is geometry that has no connection to anything at the layer where it first appears. It is literally floating. The slicer sees it as a new object starting from nothing, and without a support pillar underneath it from the very first layer, it will drift, warp, or simply not adhere. In jewelry this matters because the same feature can look like an overhang from one angle and an island from another — and most slicers won’t warn you which one it is. A prong tip viewed from the side is an overhang. Viewed from below at the first layer it appears on, it may be a fully disconnected island. Orientation changes this. Rotating the model 30–45° often converts problem islands into manageable overhangs. When it does not, support is not optional — there is no threshold, no case-by-case evaluation. Island means support, every time. |
Support Density and Spacing by Surface Type
| Surface Type | Spacing Guideline | Rationale |
| Flat horizontal | 1 support every 2–3 mm | Maximum coverage — high peel force zone |
| Organic curves | Every 4–6 mm | Follow curvature; avoid visible surface clusters |
| Angled (30–45°) | Every 6–10 mm | Partial self-support reduces density needed |
| Vertical walls | Minimal / none | Self-supporting; supports cause more harm than good |
| Filigree | 0.8–1.2 mm intervals | Dense enough to prevent peel deflection in open geometry |
2. Your Resin Type Changes Your Support Strategy Completely
This is the most overlooked variable in every support settings guide that exists right now — including most manufacturer documentation. There is a widespread assumption that all castable resins behave the same way. They do not.
Standard Castable Resins (Polymer-Based)
Traditional photopolymer castable resins — entry-level Anycubic, Phrozen, budget DLP materials — are rigid after printing. They are brittle in the sense that they snap under force rather than flex. For these, small contact points (0.10–0.25 mm) are essential because removal requires precise mechanical force, and any large contact scar on rigid resin is difficult to clean without grinding into the detail beneath.
Wax-Based Resins: A Completely Different Beast
High-wax-content materials — BlueCast X-Wax (80% real casting wax) and Envision One’s castable wax materials — are not brittle. They are soft, flexible, and mechanically closer to injection wax than photopolymer. This changes your support strategy at three distinct points:
- During printing: Soft wax resins are more susceptible to peel deformation. You may need better-distributed supports than standard guidelines suggest — not more, but smarter.
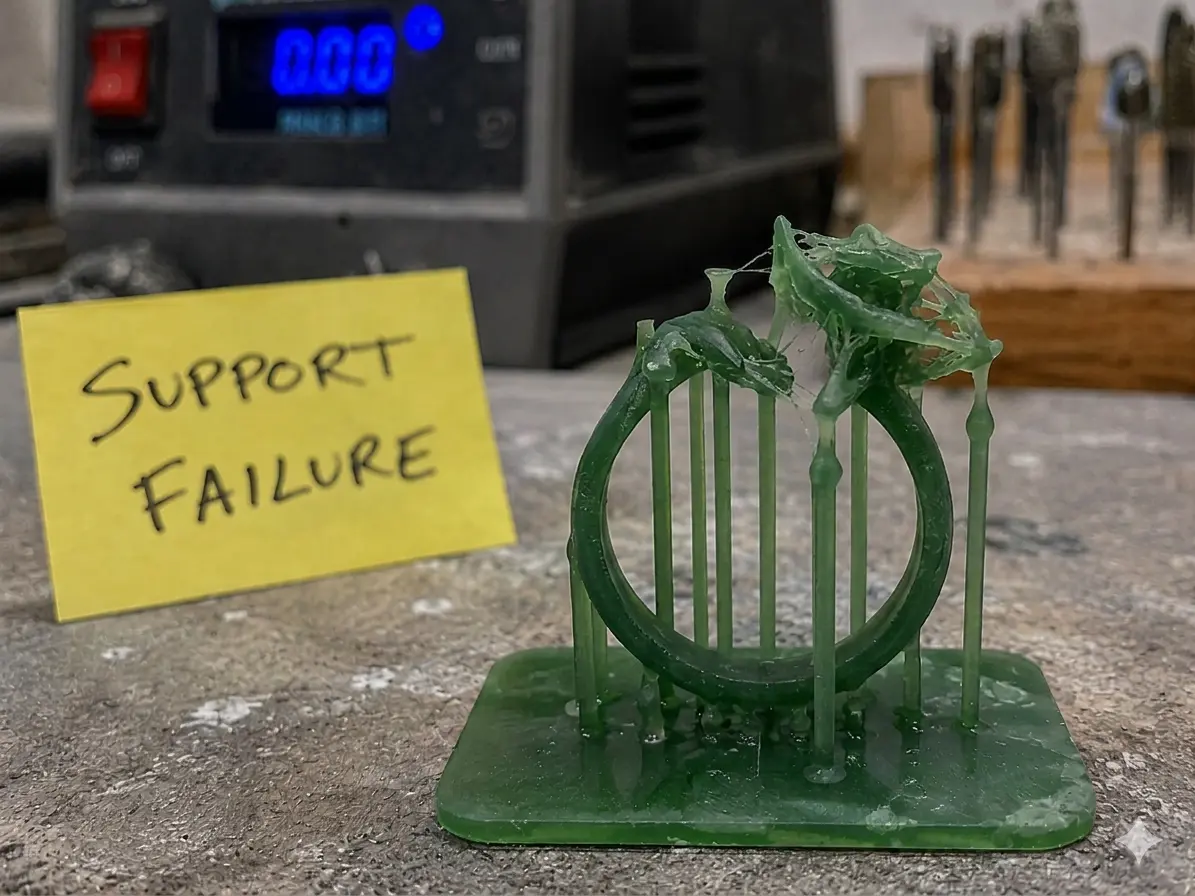
- At the oven/burnout stage: Envision One wax resins are strong during printing but behave as true wax under heat. Poorly supported casting tree models can shift before metal is poured. Tree design and sprue positioning are critical.
- During support removal: A thin prong in BlueCast X-Wax has real-wax flexibility — it can bend rather than break. Use UV post-cure before removal to harden delicate sections, or warm the model slightly to soften the contact points themselves. This post serves as a curing guide for BlueCast X-Wax resins. You can read more details here.
| 📌 Key distinction
Wax-based resins (BlueCast X-Wax, Envision One) are not fragile — they are soft. Standard brittle-resin support guidelines assume snap-off removal. Wax resins need peel-resistant placement and careful warm/UV handling during removal. Do not apply the same defaults to both. |
3. Orientation: The Setting Everyone Skips That Matters Most
Before you change a single support parameter, ask whether your model orientation is right. Proper tilt can eliminate 40–60% of required supports before you touch anything in your slicer. It also moves layer lines off visible surfaces and reduces the cross-section area separating from the vat each layer — which directly reduces the peel force your supports have to survive.
| Jewelry Type | Best Angle | Avoid | Key Tip |
| Rings | 30–45° tilt | 0° flat | Gallery opening tilted slightly up — prevents resin pooling |
| Pendants | 15–25° tilt | Flat face-down | Orient bail at top for natural support flow |
| Earrings | 20–35° tilt | Completely flat | Mirror pairs for consistent orientation |
| Bangles | ~45° tilt | Flat (suction trap) | Consider modular print-and-assemble for wide bangles |
The 45° rule is not magic — it is the result of minimizing both the maximum unsupported span at any layer and the per-layer peel surface. For jewelry specifically, the tilt that works best is whichever moves the most delicate features (prongs, filigree edges, gallery walls) to an angle where they are either self-supporting or receive clean, removable support contact.
Adjusting the model’s angle in the software is a completely visual process. In the video below (timestamped at 13:58), you can see how to properly orient jewelry pieces to minimize peel force:
4. One Thing About Resolution Tables You Need to Know
Resolution tables for jewelry printers are everywhere — and almost all of them present K-rating (2K, 4K, 8K, 12K) as if it directly equals print quality. It does not.
What determines the actual minimum contact diameter you can reliably print is the physical XY pixel size — measured in microns — which depends on both the screen resolution and the physical LCD panel size. A 12K screen on a large 10-inch panel can produce coarser pixels than an 8K screen on a smaller 6-inch panel.
| ⚠️ Before setting contact diameters
Always verify the actual XY pixel size (in microns) from your specific printer’s technical spec sheet — not just the K-rating on the marketing page. If your printer does 35-micron pixels, your minimum reliable contact tip is around 0.15 mm. At 19 microns, you can go to 0.10 mm with confidence. |
5. The Cost of Getting It Wrong — And the ROI of Getting It Right
Over-supporting is the most expensive habit in resin jewelry printing that nobody talks about. Every unnecessary support pillar is resin you paid for and cleanup time you are billing. At production scale, this compounds fast.
| What Over-Supporting Actually Costs | Impact |
| Excess resin consumption | +20–50% material per piece depending on orientation and density |
| Longer print height | Taller support trees = longer print time per build |
| More cleanup labor | +20–40% post-processing time per piece |
| Support removal per piece | +5–15 minutes of bench time (varies by resin and complexity) |
The flip side is also true. When support settings are dialed in — correct orientation first, minimal viable contacts, density matched to geometry — the savings are immediate and compound across every print.
6. When Manual Settings Hit Their Ceiling — And What Comes Next
We are honest about this at JewelsPrint: manual support configuration is the right approach for some workflows. One-off custom pieces, low volume, simple geometry — a skilled operator with a good slicer and the settings above can get excellent results.
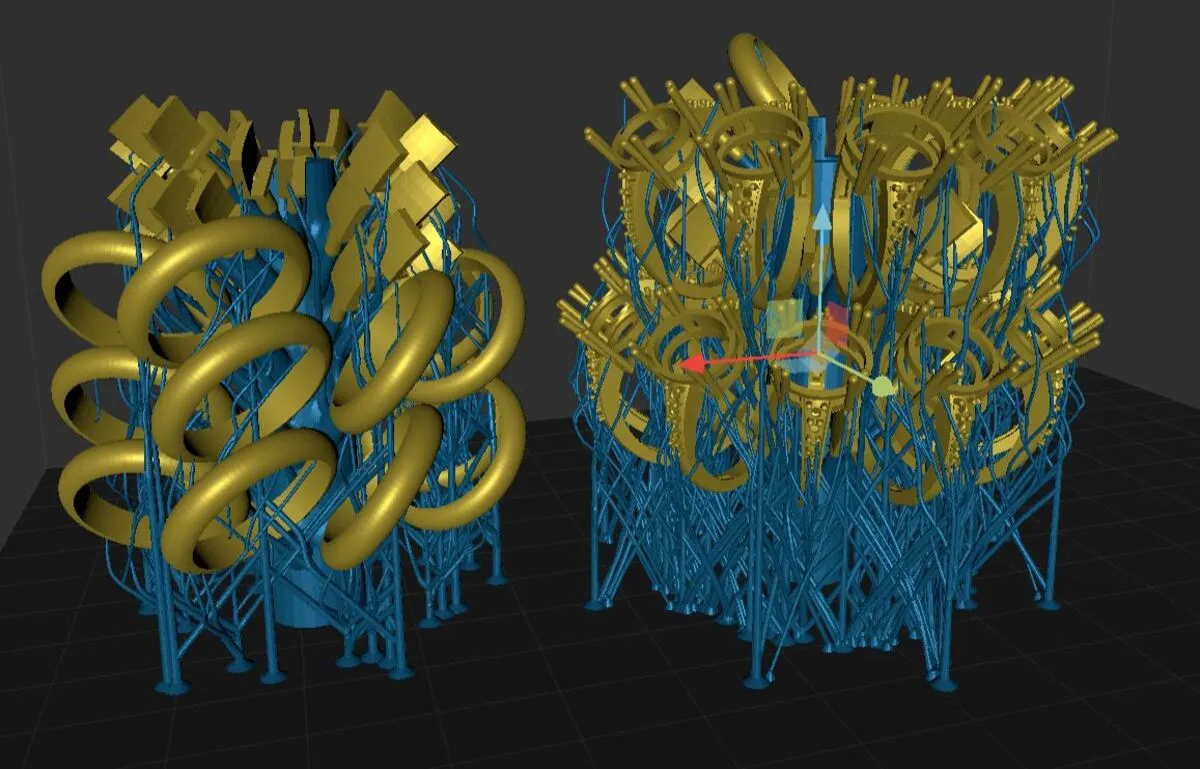
But the math changes completely when you move to casting trees. A tree with 40 models packed into a tall structure has thousands of potential support interactions. Manual pillar placement cannot account for cross-model peel forces, shared load distribution, or the way support paths from one ring interfere with the cleaning access on the model above it.
This is the gap JewelsPrint was built to close. Our smart support system uses A* pathfinding to route curved supports through the gaps between tightly packed models — the same precision logic used in navigation, applied to the millimeter-scale geometry of a casting tree. Supports weave to the base plate through the narrowest corridors, merging into reinforced trunks where paths converge. The result is a structure that is rock-solid during printing and opens up completely for cleaning.
| Metric | Manual Placement | JewelsPrint Automated |
| Time per model | 15–60 min | Under 1 minute |
| Resin usage | Baseline | 30–40% reduction |
| Support removal time | 10–30 min | 5–15 min |
| Casting tree optimization | Not feasible | Fully automated |
The question is not whether automated support generation is better — it is at what production volume it stops being optional.
The Short Version
If you take nothing else from this guide, take these five things:
- Match contact diameter to the feature: 0.10–0.15 mm for filigree, up to 0.50 mm for bezels. The slicer default is probably wrong for jewelry.
- Fix orientation before touching any other setting. The right tilt eliminates 40–60% of your supports before you start.
- Know your resin. Wax-based materials (BlueCast X-Wax, Envision One) are soft — not brittle. They need peel-resistant support distribution and careful post-cure before removal.
- Check your printer’s actual XY pixel size in microns — not just the K-rating on the box.
- If you’re running casting trees at production volume, manual placement is not scalable. That’s not an opinion — it’s arithmetic.
The difference between a successful 3D-printed jewelry workflow and an expensive source of failed prints almost always comes down to these settings. Get them right once, and the workflow pays for itself in every build after. Jewelry 3D printing support settings are not glamorous. But they are why some studios run 90%+ success rates and others treat failed prints as a cost of doing business. Dial them in once and they carry forward into every build.
| 🚀 Ready to automate?
JewelsPrint generates fully optimized casting trees with smart jewelry support — in under a minute per model. No CAD expertise required. Try it free at jewelsprint.com |